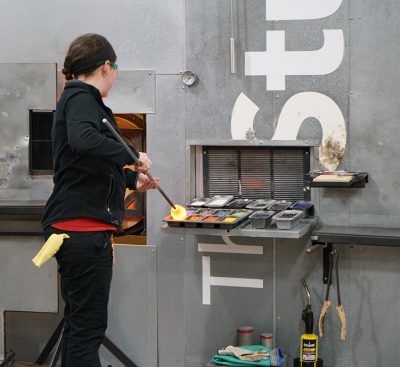
I was given the chance to make a rose paperweight, a Make Your Own Glass project that is new to The Corning Museum of Glass this year. It falls under the “glass forming” category of Make Your Own Glass projects and is considered one of the more hands-on experiences that the Museum has to offer (available to ages 14 and up). I was nervous to try my hand at the rose paperweight, as I have only made glass one other time.

Tess is suited up and ready to get to work on her rose
paperweight.
After being properly equipped with safety glasses, an apron, protective sleeves, and gloves, I was seated at the work bench. From there, Erica Simon, a glass blower at The Studio, gathered a small bit of clear glass on her iron and brought it to the bench for me to begin. The iron has to be rotated constantly in order to keep the molten glass from dripping onto the floor. Erica then went back for another gather of glass, which doubled the size of the soon-to-be paperweight. While continuing to rotate the iron, I used a wooden block soaked in water to shape the molten glass into a sphere and ensure that it was on center. This aspect of the project was on the easier side, despite the fact that both hands need to move together to keep the glass centered. I was successful in turning my glass blob into a glass sphere.
After the glass was shaped, color was added using small bits of crushed glass called frit. I chose a vivid red, which looked brown due to the high temperature that is necessary to shape glass. Erica rolled the glass through the frit, similar to how one would roll an ice cream cone through sprinkles. She then returned the hot glass to the reheating furnace, where the frit melted into the surface.
-
- Erica adds color by rolling the glass through the frit.
-
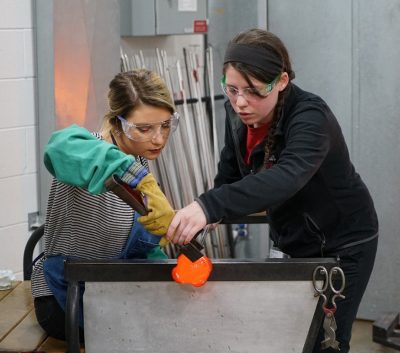
- Erica helps Tess pull out the petals of her rose.
Next, I began pulling the petals of the rose using flat crimps. This was the most challenging aspect of the project because I needed to work quickly in order to effectively pull out all the petals before the glass became too cool. This process was done twice, giving the rose two rows of petals that added to its depth. My petals were a little wonky, but definitely had some personality.
After a quick reheat, it was time for me to twist the center of the paperweight using tweezers. Again, I needed to work quickly – I could feel the glass becoming ridged around the tweezers before slowly pulling them out. This gave the project a finishing touch, making it appear to have a center in the same spiral pattern of a rose. Erica then removed the paperweight from the iron by adding a constriction line using jacks, which was located where the glass met the iron. She added a flat base to the project and set it in the annealing oven to cool.
-
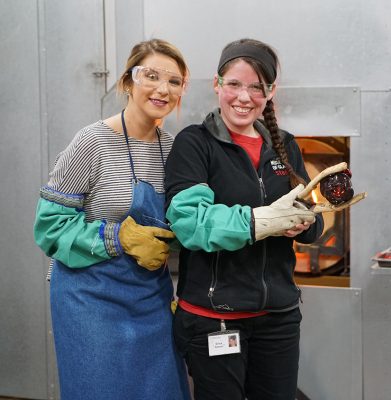
- Tess and Erica with the rose just before it goes into the annealer for cooling.
-
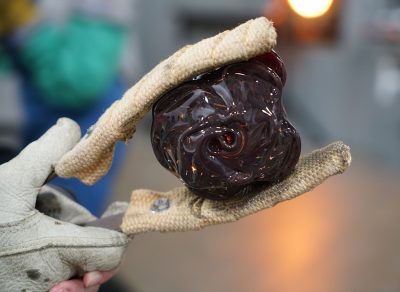
- Tess’ finished rose is ready for cooling.

Tess’ finished rose paperweight.
I picked up my rose the next day, after it had cooled. Overall, I’m very happy with my finished product. Although my petals are a bit uneven, I think each Make Your Own Glass project should be unique. Erica was very helpful and made sure my rose, despite its “character,” still looks like a rose.
The rose paperweight is the perfect activity for a fun and unique Valentine’s Day. This and the other Valentine’s-themed projects will be available to make through February 14. Make your reservation today at http://reservations.cmog.org!